
Plants
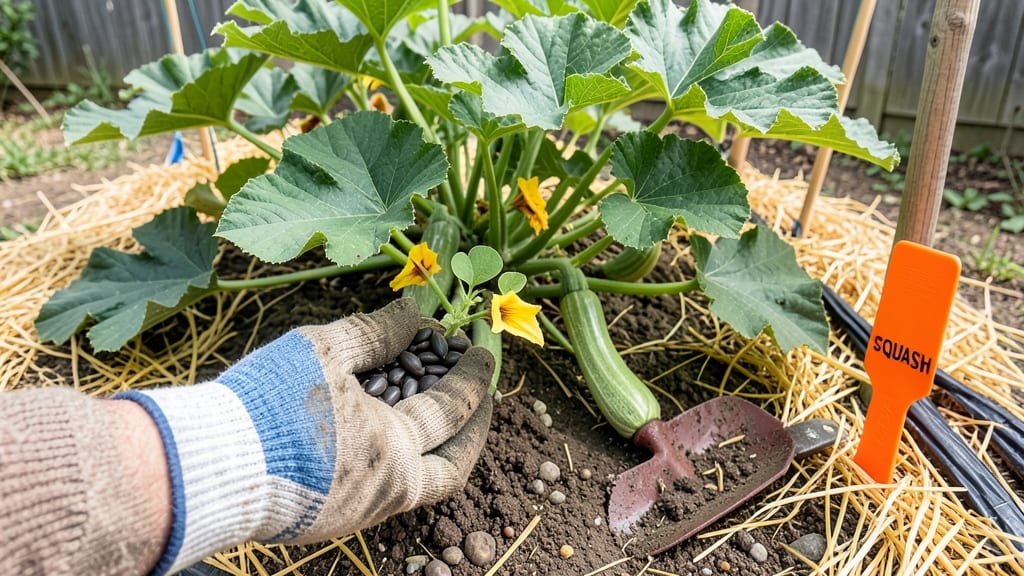
Planting squash in Texas isn't just about dropping seeds in the dirt—it's about beating the clock between frost and scorching heat.
Whether you're growing 🎃 butternut squash in North Texas or zucchini in South Texas, timing your spring planting after the last frost date (typically February 15 in North Texas or January 1 in South Texas) is the key to avoiding wasted effort.
Texas gardeners know that squash thrives when soil temperatures hit at least 60°F, which usually means waiting until late February or early April in most regions. But rush it, and you risk seedlings wilting under the 100°F+ summers that follow.
The good news? With the right strategies—like using black plastic mulch to warm the soil faster—you can extend your growing window and enjoy a harvest from June through October.
If you're new to Texas gardening, don't stress over exact dates. Instead, focus on soil readiness and regional cues: South Texas gardeners can start as early as January, while North Texas growers should wait until early April to avoid late frosts.
The goal is simple: give your squash plants a strong start before the Texas sun takes over.
In this guide, I'll break down the exact planting windows for your heat zone, share pro tips for transplanting vs. direct sowing, and help you avoid common mistakes that turn hopeful seedlings into sad, wilted memories. Let's get your garden ready for a bumper crop!
Texas heat zone planting calendar: exact dates for squash success by region
Texas spans USDA hardiness zones 8a through 10b, creating wildly different planting conditions from the Panhandle to South Texas.
In North Texas (8a-9a), gardeners face late frosts until mid-April, while South Texas (10a) enjoys frost-free winters—meaning your zucchini or butternut squash can hit the ground as early as January. The key? Planting when soil temperatures hit 60°F (15°C) and aligning with your region’s last frost date.
For summer squash varieties like zucchini or yellow crookneck, timing is critical—they bolt (go to seed) in extreme heat, so aim for early spring or late summer plantings. Winter squash (pumpkins, butternuts) have more flexibility but still need 60-70 days frost-free to mature.
Below, I’ve broken down the exact planting windows by Texas region, including transplanting tips and soil prep tricks to maximize your harvest.
🌱 PRO TIP: Use black plastic mulch to warm soil faster—this can shave 2-3 weeks off your planting timeline in cooler zones like North Texas (8a). Just lay it down 1-2 weeks before planting to raise soil temps by 10-15°F.
| Region | USDA Zone | Last Frost Date | Ideal Planting Window | Soil Temp Requirement | Notes |
|---|---|---|---|---|---|
| North Texas (Lubbock, Amarillo) | 8a | Mid-April | Late April–Early May | 60°F+ (15°C+) | Use row covers for early starts; transplant after May 10. |
| Central Texas (Austin, San Antonio) | 8b-9a | Early March | Late February–Early April | 60°F+ (15°C+) | Direct sow after last frost; succession plant every 2 weeks. |
| South Texas (Houston, Corpus Christi) | 9b-10a | Mid-January | January–March | 65°F+ (18°C+) | Plant year-round; avoid July–August (extreme heat). |
| All Regions | 8a-10a | N/A | Late Summer (Aug–Sept) | 60°F+ (15°C+) | Fall planting avoids summer heat; harvest before first frost. |
In North Texas (8a), where frosts linger until mid-April, I recommend starting zucchini and summer squash as transplants after May 10. Seedlings can handle cooler soil than seeds, giving you a 2-week head start.
For winter squash like pumpkins, direct sow after Memorial Day to avoid cucumber beetles, which thrive in early spring.
Central Texas gardeners have the best of both worlds: a longer frost-free season (240+ days) and warmer soils. Here, I plant summer squash in late February (under row covers) and winter squash in early April.
The trick? Succession planting every 2 weeks ensures a continuous harvest from June through October. For example, my butternut squash goes
How to extend your squash growing season in Texas: cold frames, row covers, and succession planting
Texas summers are long and hot, but our short frost-free windows can leave gardeners scrambling to maximize squash production. The key to success lies in extending your growing season—whether by protecting tender seedlings from late frosts or shielding mature plants from scorching afternoon sun.
With the right techniques, you can enjoy homegrown zucchini, butternut, or pumpkin squash for months longer than the standard spring-to-fall window.
One of my favorite tricks is using cold frames or row covers to create microclimates that push the boundaries of what’s possible. These tools aren’t just for beginners—they’re game-changers for experienced gardeners too.
For example, a simple hoop house covered with floating row fabric can add 2-4 weeks to your early spring planting window, while black plastic mulch warms the soil faster, helping seedlings establish before the last frost.
Plant cold-hardy varieties like 'Waltham Butternut' or 'Early Prolific Straightneck' 3-4 weeks before your last frost date.
Use row covers or low tunnels to protect seedlings from late frosts (down to 28°F), extending your early planting window by 4-6 weeks.
Implement succession planting every 2 weeks from late spring through early summer to ensure a continuous harvest.
For fall planting, use shade cloth (30-50%) to protect squash from intense afternoon sun in late summer, allowing vines to thrive through September.
Harvest winter squash varieties (like 'Sweet Dumpling' or 'Carnival') in late fall and store them in a cool, dark place (50-55°F) to enjoy through winter.
Don’t overlook succession planting—this simple strategy involves sowing new squash seeds every 2-3 weeks throughout the growing season. In Texas, where summer heat can be relentless, staggered plantings ensure you’re always harvesting fresh produce instead of facing a glut all at once.
For example, plant your first batch in early April, then follow up with additional seeds in mid-April, late April, and early May. This approach works especially well for bush varieties like 'Eight Ball' zucchini, which mature quickly (just 45-50 days).
For gardeners in North Texas (Zone 8a), where frosts can linger into March, I recommend starting seeds indoors 4-6 weeks before your last frost date and transplanting them into a cold frame or under row covers. This gives you a head start on the season.
In South Texas (Zone 9b-10a), where winters are milder, you can plant directly in the garden as early as January—but always monitor soil temperatures (aim for 60°F or warmer) to avoid stunted growth.
Protecting your squash from extreme heat is just as critical as shielding it from cold. In Central and South Texas, shade cloth (30-50% coverage) can make a world of difference during June and July, when temperatures often exceed 100°F.
I’ve seen gardeners double their yields by providing afternoon shade while still allowing full morning sunlight, which squash vines crave. Pair this with drip irrigation to keep foliage dry and reduce the risk of powdery mildew, a common issue in humid Texas summers.
Finally, don’t forget about fall planting—this is where many Texas gardeners miss out on a second harvest. If you plant winter squash varieties like 'Butternut' or 'Acorn' in early August, they’ll mature just in time for a late September or October harvest.
Use row covers again to protect young plants from early morning frosts in November, and you’ll extend your season well into the cooler months. With these techniques, you can turn Texas’s challenging climate into an advantage for a longer, more productive squash season. 🎃